A little while ago, I tried to write a tutorial about making trees in Blender, but I failed. So I'm just giving you this link to BlenderGuru.com. The video tutorial was made by Andrew Price, the head of BlenderGuru. It will probably work fine, but remember, if you followed my instructions, you should have Blender 2.49b on your computer, whereas Andrew Price had Blender 2.49a when he made the tutorial.
http://www.blenderguru.com/how-to-create-stunning-trees/
There's also a great one about how to make grass....
http://www.blenderguru.com/the-secret-to-creating-realistic-grass/
Monday, August 9, 2010
Thursday, August 5, 2010
Blender Game Engine Tutorial: Part Four
In the last three tutorials, Nate Nelson Blender Game Engine Numbers One-Three, you made a Cube-guy, gave him some texture, made a ground, a background, and an enemy. This is my rendered enemy.
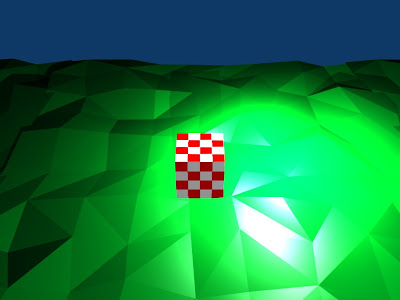
NOTE: To make him checkerboard, Make the first color red, then the second one white. Go to the textures panel and click 'Nodes.'
Now. In this tutorial you will learn how to make your enemy track you, and how to defeat him and make your game first-person.
1.First, go to top view with NumPad 7. Select your Enemy with the Right Mouse Button. Then hit NumPad Delete. Make sure you hit the one on the NumPad, otherwise you will have just killed your Enemy without raising a weapon.
NOTE: In all these tutorials, Number Lock (In the top, left-hand corner of the NumPad) MUST BE SELECTED! On most keyboards, a light will go on when Number Lock is on.
2.Now, with your Enemy selected, go to the Logic Editor panel (F4). Click on Add, Add, and Add. Connect the three, of course. Then change the 'Always' in the Sensor panel to a 'Near.' Then click on 'Property,' then type in 'Cube.' Make the 'Distance' to twenty (20.00). In the Actuators panel, make the middle button on the Loc row zero, point zero-five (0.05.)
3.Go back to your Cube-guy, and add a cylinder. Use the Widges to rotate and move it until it's sticking out of the front of your Cube-guy.
This is my Cube-guy with his sword sticking out of the front of him. Scale down the cylinder and switch to the scaling Widges by clicking on the blue square next to the green circle and the red triangle which is next to the pointing-hand icon that activates the Widges.

Select the sword. You can give it a color and texture, if you want. Or you can press F9 to go to the editing panel, then press 'Set Smooth.'
4.Now, with your sword selected, go to Logic Editor (F4) and click on 'Add Property.' Name the property 'Sword,' with a capital S.
5.Select your Enemy again, then add another thing under the Actuators panel. Click on the word 'Motion.' A menu should appear. Select 'Edit Object.' Under that, click on 'Add Object.' A menu should appear again. What's with all these menus? Select 'Track To,' then click on OB: and type in 'Cube.' Then attach your Controller to the second Actuator. Good. Now, add three more things: one Sensor, one Controller, and one Actuator. Connect them. In the Sensor, change the 'Always' to a 'Collision.' Click on 'Property,' and type in 'Sword.' Then, in the Actuator panel, change the 'Motion' to an 'Edit Object,' then under that, change the 'Add Object' to an 'End Object.'
Good! Now you can press P with your mouse over the 3D view. Make sure you can see the entire ground, so you know when you're going to fall off. Your Enemy should track your Cube-guy now. If you touch him with your sword, he will disappear. Press Escape to exit Game Mode.
6.Now we've still got some work to do. Select your sword, then go to the Logic Editor panel (and I don't need to tell you that to get there you press F4). Add a Sensor, a Controller, and an Actuator. Connect them. In the Sensor panel, change the 'Always' to a 'Keyboard.' Click on 'Key,' then press the spacebar. In the Actuator panel, change the third button in the Loc row to negative zero, point zero one (-0.01.) Now add another Sensor, Controller, and Actuator. Connect them. Change the 'Always' to a 'Keyboard.' Make the key Left Shift. Then, in the Actuator panel, make the last button of the Loc row positive zero, point zero-one (0.01). Then use the Y (green) Widge to make it so that the sword is completely inside your Cube-guy. Now, when you press P, you'll be able to move with the arrow keys, and display and retract your sword with Spacebar and Left Shift.
7.The Penultimate part of the tutorial is cloning your bad guy. Select him, then hit Shift-D. Move the clones around with the Widges. They'll all try to kill you, but you can vanquish them all!
8.The last step is to make the game either first or third person. If you're going to do first person, then select the camera, and move so it's right in front of the Cube-guy. Then Shift-select your Cube-guy and hit CTRL-P. Select 'Make Parent.' Good.
NOTE: I'm sorry. The sword should be next to the Cube-guy, instead of in him. And the camera should be a little farther forward than him. Sorry. And you should make the camera and sword both actors, dynamic.
9.If you want to make your game third-person, just do the same thing I told you to do, but put the camera kind of looking over his shoulder.
Well, this just about wraps up the fourth Nate Nelson BGE Tutorial. Have fun on your game, and I'll see you next time!
Wednesday, August 4, 2010
Blender Game Engine Tutorial: Part Three

Hi! It's me again. Ready for another Nate Nelson Blender Game Engine Tutorial? No? Hm...All those in favor, raise their subsurfed cylinders on the Z Axis, all those opposed...
Just kidding. Last time we made a ground, sky, and lighting, not to mention tracking to constraint the cameras to our Cube. This time, we'll make our Cube move in Game Mode with the arrow keys, and start making an enemy we can fight. So, everyone, START YOUR GAME ENGINES!!!!
By The Way, that was what my rendered image looks like. Yours should look something like this, unless, of course, you used differant colors or textures.
1.To start, we'll have to make our Cube an actor. To do this, go to the Logic Editor panel by pressing F4. Under the word 'Panels' is a pink strip of buttons. Select 'Actor,' then click on the word 'Static,' which should be to the far left of the pink strip. a menu should appear. Click on 'Dynamic.' This will make your Cube's will bend under the mighty power of...
2.Gravity. You can test this force by bringing your Cube about 6 Blender untis upwards on the Z Axis. Either use the blue Widge or press 'G,' then 'Z,' then '6.' Then press Numpad zero to go to camera view, then 'P' to start the game. Your Cube should fall onto the ground you made. Press Escape to exit Game Mode. Your cube is still in the air. Do put it back, use the blue Widge or press 'G,' '-Z,' then '6.' Make sure that you press the hyphen key (-) before the Z, or your Cube will go up, instead of down. When it goes down six Blender units, click the Left Mouse Button or hit Escape to exit Grab Mode.
3.Now we're ready to make your Cube move. Select him with the Right Mouse Button, then press F4 to go to the Logic Editors panel. You will see three bluish-greenish buttons that each say 'Cube.' Beside them are three buttons that each say 'Add.' Click all three of the Add buttons.
4.Under the first 'Cube' button is an option that says 'Always.' Click on it. A new menu will appear. Select 'Keyboard.' The menu should extend into a purple one that says 'Key,' 'Hold,' 'All Keys,' 'LogToggle,' and 'Target.' No, this does not mean the department store. Click on 'Key.' The button will be selected, and the words 'Press a Key' will appear. Hit the up arrow on your keyboard.
NOTE: When I say the up arrow on your keyboard, I do NOT mean on your NumPad. I mean the four buttons with arrows on them next to the NumPad.
5.Now Track to Constraint your eyeballs over to the third and last panel. BTW, these three are called the Sensor, the Controller, and the Actuator panels. Notice that under 'Simple Motion' there are six rows of buttons, the top one being 'Loc.' This stands for 'Location.' See that all three of the options are at 0.00. Use the left-facing arrow on the middle button to move the number down to negetive zero, point ten (-0.10).
6.Now, if you press 'P' to go to Game Mode...nothing will happen. That's because you have to physically connect the Sensor, Controller, and Actuator panels. Notice that there's a gold sphere on the right side of the Sensor and Controller panels. Click and hold on the sphere to the right of the Sensor panel, and drag the mouse to the gold circle to the left of the Controller panel. When your mouse is hovering over the circle, let the Left Mouse Button go. Repeat that process to connect the Controller panel to the Actuator panel.
7. Good job! Now, if you press 'P' to go to Game Mode, and press the up arrow, your guy will move forward. Now we're going to do the same thing all over again. Press Add, Add, and Add. if you want to make this big so it's easier to see everything, put your mouse over the S, C, and A panels, hold down CTRL, and press the down arrow key. This will maximize the window. So now that you have added three more, uh, things, connect them like before, and change the 'Always' to a 'Keyboard.' Click on 'Key' and press the right arrow. Go over to your new Actuators panel and, on the 'Rot' (which stands for Rotate) row, make the last number negetive zero, point ten
(-0.10). This makes the guy rotate to the right.
8.Now add three more things (sorry I don't know the actual word for them). Repeat what you've done before. The Keyboard, pressing the Key button then the left arrow key, then attaching them. This time do the same thing in the Actuator panel, but make the Rotation positive zero, point ten (0.10), not negetive zero, point ten.
9.Good. Now all we have to do is add another three things. Attach them. Set the Key to 'down arrow key.' Then, on the 'Loc' row, make the middle one zero, point ten (0.10). After you've done that, press CTRL-down arrow to minimize the panels menu. Then press 'P' to start your game. Move your guy around with the arrow keys. Congradulations! You have made your Cube-guy move!
10.Press Escape to exit Game Mode. Now, with your mouse over the 3D view, switch to top view with NumPad 7. Scroll out until you can see all around the ground. then select the ground with the Right Mouse Button. Hit Shift, then the 'D' key. Hit Escape to exit grab mode. Then use the green Widge to move it forward. Repeat this process using the Y and X (green and red) until you have eight duplictes on every side of the original. this way, you won't fall off the edge so easily.
11.Add another cube with Shift-A. If you remember how to make a new color, do so. Red or black is ideal, because this is going to be the enemy. But, do whatever you want. It's your game. You can give him a texture, too.
12.Now, select your Cube-guy with the Right Mouse Button. Go to the Logic Editor panel (F4) and press 'Add Property.' Name the property 'Cube.' Make sure you use a capital 'C.'
13.Select your bad-guy. Go to the Logic Editors (F4) and click Dynamic>>Actor. Good. Now both your guys are actors, ready to act in your game. Have fun, and I'll see you next time!
Blender Game Engine Tutorial: Part Two
Hi! It's me, Nate Nelson again. In my last BGE tutorial, we made a cube, gave it some texture, and rendered it. In this tutorial, we'll make a background for our guy.
1.Begin by making sure the 3D cursor is in the right place. The 3D cursor is a small, red-and-white striped circle that tells you where you mesh is going to appear. You can move it to where you want by clicking the Left Mouse Button, but right now, we need it in the center of the cube. If it isn't already, deselect the cube by pressing A. Then click the small pink circle in the middle of it with the Left Mouse Button. Press Numpad 1 to switch to front view. make sure that the 3D cursor is over the pink circle in all three directions: Numpad 7/ Z Axis, Numpad 1/Y Axis/ Numpad 3/ X axis. If it is, then you can move on with this tutorial.
2.Click "Add," in the top, left-hand corner of the screen, or hit Shift-A on the keyboard. Move your mouse to "Mesh," then "Plane." From top view, you will see the cube become unselected. Move down with your Numpad buttons, or the Middle Mouse Button. You will see a pink line through the center of you cube. This is the edge of your newly-created plane.
3.Switch back to top view with Numpad 7. Then press "S." Don't move your mouse, but press one, then zero. This will scale the plane ten times, to make the ground.
4.If you remember how to give things color from my last tutorial, then you'll know what to do to make the ground green. Of course, as I've said before, this is your Blender, your cube-guy. You can make the ground whatever color you want. But make sure you name the color, as I told you how to do last time.
5.God job so far. Now would be a good time to save your work. If you want this to be more modifications on your last document, then just save over. But if you want to do this in steps, then hit F2 on your keyboard. The Save As menu will appear. Save this under the same name as before, but put a '2' after it. This shows that this is differant from your last Blender document.
6.With your "ground" still selected, switch to Edit Mode by pressing the Tab key. With your mouse over the ground, press 'W.' Another menu will come up, on which you will select the option 'Subdivide Multi Fractal.' It will ask for a number of cuts. click the arrows to move it to '8.' Then it'll ask for a "Random Fac." A four would be good for this, but you can expiriment! When you're done, switch back to Object Mode with the Tab button.
NOTE: To undo something, press CTRL-Z. This goes with most Microsoft programs, but I just wanted you to know for sure.
7.You can render now, if you want. You can render any time, really. So. Now is the time to add another sun. Press Shift-A,>>Add>>Lamp>>Hemi. A Hemi Lamp should appear where ever the 3D cursor is. Now, with the Hemi Lamp selected, hold down Shift and click on your cube with the Right Mouse Button. Now, if evything went right, your cube is outlined in pink and your Hemi lamp is magenta. Hit CTRL-T, and select "Track to Constraint." Now the Hemi Lamp should follow your cube wherever it goes. Move him around with the Widges, just to test it out. And remember, if anything goes wrong, just post under this comment.
8.Now. Select the Camera, the pyramid wireframe object, then hold down Shift and select your cube-guy. (If you don't have a camera, and I don't see why you wouldn't, hit Shift-A>> Add>> Camera.) Hit CTRL-T on the keyboard, and, once again, click on "Track to Constraint." This will make the camera follow your guy wherever he goes.
NOTE: You can switch to Camera Mode with Numpad Zero, then press it again to switch back to 3D view.
9.Now, if you're not already there, switch to the Color Editor panel, but click on the picture of the earth, instead of the red sphere. Select 'Blend,' 'Paper,' and 'Real.' Then use the HoR, HoG, and HoB sliders to determine the colors of the horizon. I put my HoB slider to all, and the others to none. That made a beautiful dark blue horizon, but, like I've said, just do your own thing.
Now, if you'll render, you'll see that you have a fully-colored and textured cube-guy, a hilly ground, appropriate lighting, and a good-looking background. Save your work, close out Blender, and take a break. You've finished your second Nate Nelson BGE Tutorial. Nice Work!
Blender Game Engine Tutorial: Part One
Hi! I'm Nate Nelson, and I'm writing this tutorial for anyone who likes to animate or make video games. I am here to say that there is an amazing program called Blender that will assist you in either of the above.
This Tutorial is about BGE: Blender Game Engine. First, if you don't have Blender installed on your computer, go to http://www.Blender.org/. From the home page, click "Version 2.49, Download Now." Go through the installation, and when you're finished, open Blender 2.49.
1.The Default screen has a gray background and a cube. You can use the Numpad or the middle mouse button to move around the view. MAKE SURE NUM LOCK IS SELECTED!!!!!!
NOTE: When you move around your view of the cube, you may notice that the perspective isn't very good. That's because you have the view set on 'User Ortho,' instead of 'User Persp.' Press the Numpad 5 key to change this.
2.Now. You can see that your cube is a dull shade of gray. To change this, go to the buttons in the upper, left-hand corner of the panel in the lower half of the screen, or just press F5.
3.Now you see that five more buttons have appeared. One with a light bulb, one with a red sphere, one with a square with brown spots on it, one with the toxic waste symbol, and one with the earth on it.
4.The light bulb button should be selected. Click on the red sphere instead. A new menu will pop up, with a big, gray sphere on the left side. Notice the three color pallets. The first should be gray, the second and third white. Select the first one. A color mixer will appear. You may make your cube any color that you wish.
5.Notice that under the Links and Pipeline header, there is a sub-header that says link to Object. under that is a pink strip with the word MA: MATERIAL on it. Click in it, and Material will disappear. Type in the name of the color i.e. Lime Green, Aqua Blue, Red-Orange, etc.
6. This next step is not necessary, but it gives your cube guy character. While still in the color panels, click on the symbol next to the red sphere: the square with brown spots. This will bring you to the texture panel. with the cube still selected, (having pink borders. If it isn't selected, do so with the Right Mouse Button) click under Texture Types. Go through the list and see which texture you want for your cube guy. I usually use Clouds, but you don't have to. Remember, this is you guy, do what you want with him.
7. Now that you've added, texture, let's see what he (or she) looks like. And don't freak; I know that you can't see the texture yet, but that's coming. If you look around the screen, you'll probably see a circle with lines around it. That is our sun. Select it, (Right Mouse Button) then use the Widges to drag it over the cube. The Widges are three arrows you might have seen. One is blue, pointing up, one is red, pointing sideways, and one is green, pointing forwards. These represent the X, Y, and Z axises. To activate the Widges in Blender 2.49, click the button near the middle of the header with the pointing hand on it. There are three types of Widges: Moving, Rotating, and Scaling. We'll get into this later. Right now, use the X and Y (Red and Green) Widges to move the "sun" over the Cube.
8.Great Job! To end Part One of my Game Engine Tutorial for Blender 2.49, press F12. That will show you your finished result, you rendering.
NOTE: If your texture does not appear in the rendered image, it's probably because you made your cube the same color as the texture, so it won't show up. Change the color of the cube if you really want a texture.
After you admire the image for a while, save your file with CTRL-S. When you're done, exit out of Blender and take a break. You have now finished your first Blender 2.49 tutorial! Congratulate yourself, and check back here soon for another BGE Tutorial!
Sunday, July 11, 2010
Get Smart
As all of you probably know, my two obsessions now are Fiddler on the Roof and Get Smart. More the original ones with Don adams than the 2008 version with Steve Carrel.
JSYK, there's a new one coming out soon.
JSYK, there's a new one coming out soon.
Monday, June 14, 2010
Happy Birthday!
Happy birthday to me! It's June 14th, Flag Day, and my birthday!s Cooooool. I can't believe I'm already twelve!
Subscribe to:
Posts (Atom)
About Me

- Natron1
- Harpswell, Maine, United States
- I love drawing, and have created comics such as Kung Fusion, Full-Scale Alien Invasion, and Penguins of the Empire State